-
-
- 2. Connect your Interface
- 2.1.1
 Prepare your BlackBox
 -
- 3. Initial Setup
- 3.1 Firmware Update
- Method 1: Update via CONTROL
- Method 2: Update via the Internet/Wifi
- Method 3: Update via USB Flashdrive
- 4. Usage Instructions:
- 4.1 Run a Job
- 4.2 Probing
- 4.3 Configuration
- 5. Frequently Asked Questions
- 5.4 Run/Flash Jumper
- 5.5 Device Test Mode
- 6. Tips and Tricks
-
Sidebar
Table of Contents
Retrofitting Interface V1.4-V1.6 for use with BlackBox X32
Older OpenBuilds Interface versions (V1.4 to V1.6) may not be 100% compatible with the new OpenBuilds BlackBox X32. If you notice a reboot-loop or you are advised by our support team to perform the retrofit - this page deals with the practical installation of the V-EXT JUMPER.
The instructions below, once applied, may make these older versions work with the new BlackBox X32 (though not guaranteed, it can help some older Interfaces remain usable, otherwise one may need to upgrade to a newer Interface to ensure compatibility)
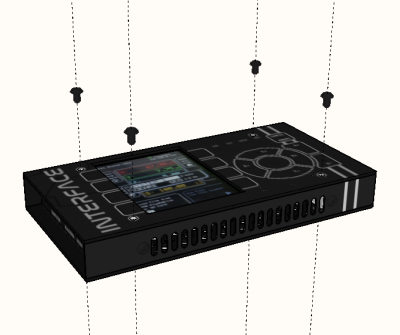
1. Disassemble the Interface
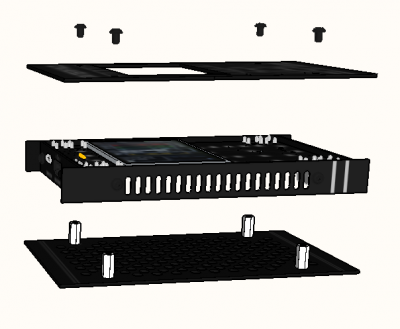
2. Remove the Back Panel
The front panel screws also hold the back panel on. Once the screws are removed, you should be able to remove the back panel with its spacers still attached. Handle the Interface main body with great care to prevent damage to the LCD - it is only held in place by the front panel.
Turn the Interface around carefully (The jumpers pins we need to access are on the back of the main board) and place it down on the table.
3. Install the 3-Way Jumper
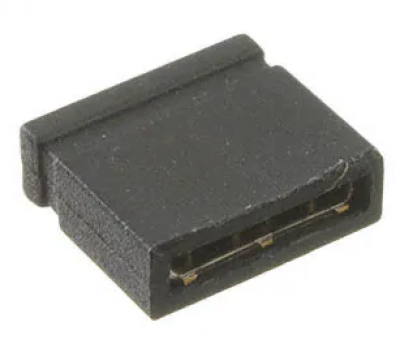
You'd need a 3-way Jumper (3rd party component, can be ordered from Amazon, Digikey https://www.digikey.com/en/products/detail/adam-tech/MSE-G/9830574 etc)
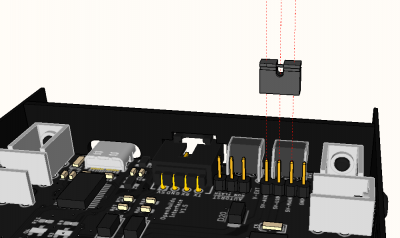
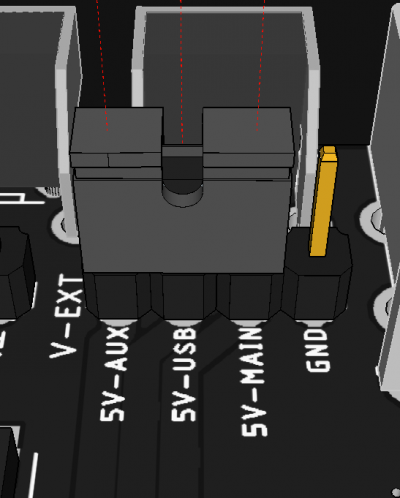
Take the 3-Way Jumper and install it on the 5V-AUX/5V-USB/5V-MAIN pins of the V-EXT JUMPER.
4. COMPLETE
Make sure the jumper is correctly installed (IMPORTANT: DO NOT LET THE JUMPER CONNECT TO THE GND PIN)
Reassemble the Interface by placing the back panel onto the main body, position the front panel back onto the front, and install the 4x M3x6mm screws (Reverse order from disassembly)
Proceed to connect and test your Interface as normal.
Page Tools
All rights reserved. This Documentation or any portion thereof including but not limited to (menu structures, images, layout, videos, graphical artwork, logos, names, trademarks, etc.) may not be reproduced or used in any manner whatsoever without the express written permission of OpenBuilds, LLC

